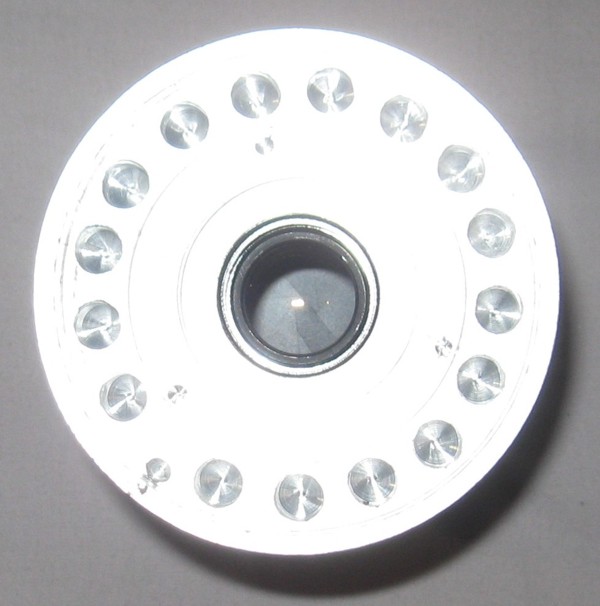
The object of this project is to produce a cascade tube based scope such as this for spotting and Night Vision surveillance.

AUNV-TEMPORARY-FORUM
[ main ][ links ][ about ][ help ][ discussions ][ projects ]| Welcome to the Aluminium Cascade Scope housing project. If you're here, I'll assume you're a part of the project, although if you're just browsing, you can evaluate
whether making your own Aluminium Housing is a good idea. The object of this project is to produce a cascade tube based scope such as this for spotting and Night Vision surveillance. | |
| Firstly, IF YOU HAVE ANY PROBLEMS WITH ASSEMBLY, then contact RICHARD or MYSELF. Don't force something to go. If it needs force, something is wrong. BE GENTLE. If you drop it, it might be enough to bend it. There are very fine tolerances involved. If you've received your Aluminium Housing kit from Richard ( Optic ) then you should also have your tube ( P8079HP ) and the other parts needed, such as a switch, wiring and an objective lens. You will also need some Silastic, a 2mm and 4mm hex key ( Allen Key or Unbrako Key ) and some clean lint-free cloth and some Alcohol wipes. Details are at the end to tell you where to obtain the other items. |
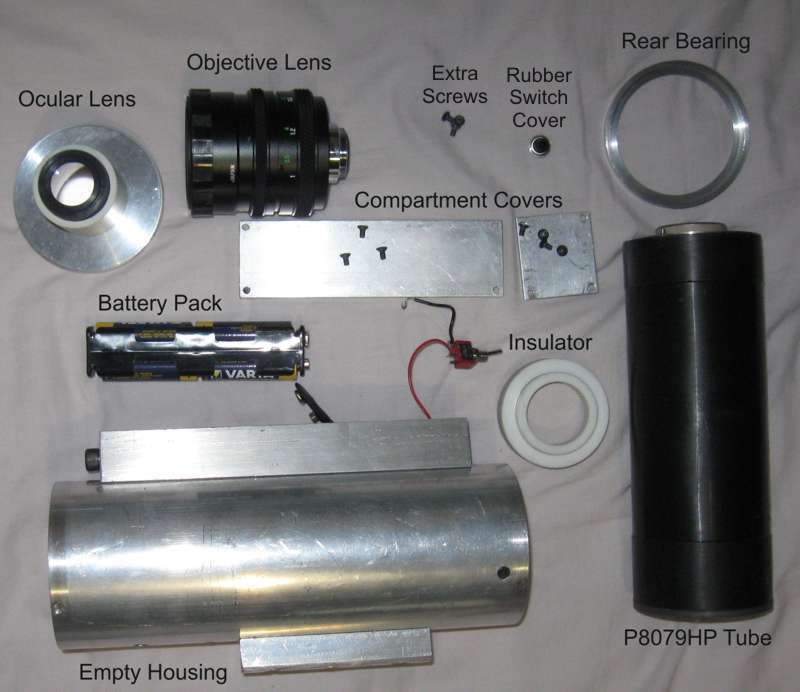
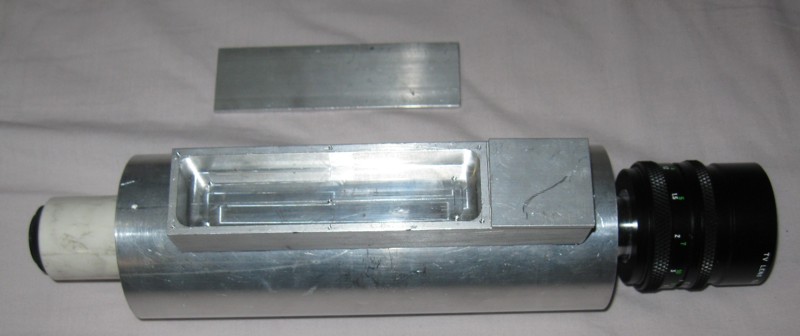
| The Empty Housing is first to prepare. First clean it. Remove the Battery Housing ( Top ) and the Mount Bar ( Bottom ) with the hex keys. One to two alcohol wipes should be sufficient. You want to remove oil from beneath the parts so the Silastic sticks. It's also a good time to remove any swarf and deburr the edges, especially the small hole between compartments where the wire will run. Once clean, seal beneath them with Silastic to waterproof them, then screw them back in. Put a small dob of silastic beneath the screws to seal fully. There is a small channel around the outside of the objective lens end cap. This is to squeeze some silastic into and smooth with your finger. Also, remove each of the three screws and silastic, then leave to cure for 24 hours. You can also install the wiring now and silastic that hole back up too. This will let your remove and replace batteries without breaking the hermetic seal later. Once this is complete, the rest of the scope can be assembled. |
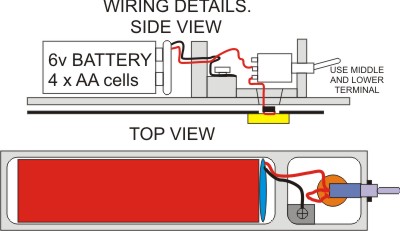
| Don't install the switch just yet - it actually goes in AFTER the tube is installed. Just solder it up and connect the ground wire, then create a loop for the positive connection. I've used black for the "extra" wire from the switch to the tube. It's better to use a slightly thicker wire here since it may get tugged around. | 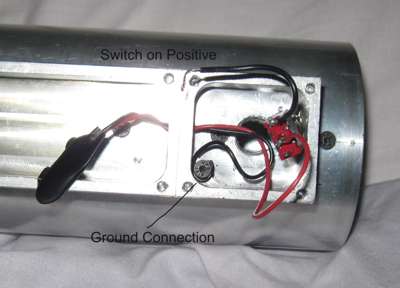 |
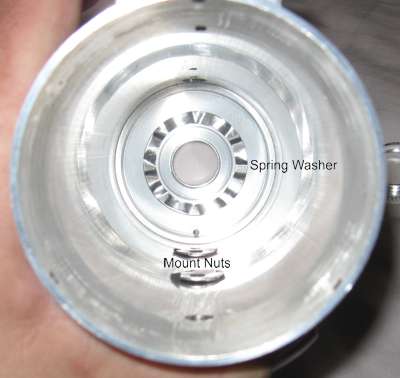 | You'll find a spring washer inside your housing. This is a wavy metal ring that will make the ground contact with your tube. Mine stayed in once inserted, but it may be nesessary to use a LITTLE glue or silicon at one location to hold it in place. It is supposed to be conductive, so don't go siliconing it in everywhere or your scope won't work. At the bottom of the picture, you'll notice a "Polarization Key" aka "A small drilled hole" just about the mount nuts in the end cap. This is to ensure proper alignment of the tube during assembly. Remember it's position. Now prepare the tube for insertion. |
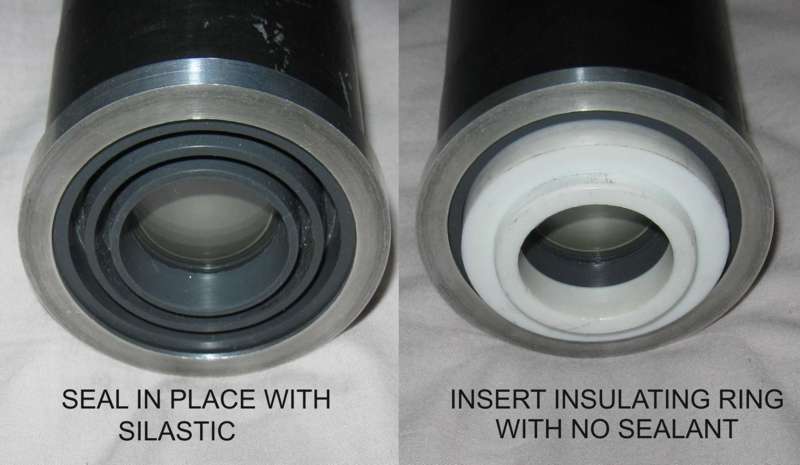
NOTE - SOME people have the insulating ring SEALED into the end cap. If that's how yours is ( Richard tells me that's how
most of you are ) then don't try to get it out. Just insert it with the end cap and be patient if it doesn't go straight in.
 | There is a bearing ring ( Aluminium ) that should be attached to the tube with Silastic. This provides structural support to the tube when assembled. There is also an insulating ring that should be simply "inserted" and not glued. Again, wait for the silastic to cure before continuing. ( You can put the plastic ring in later ). Then insert the tube so that the keyway matches up with the alignment lug. |
| The tube will cease to rotate when installed and aligned correctly, dropping into place as the alignment lug fits into the polarization hole. Once installed, you can begin fitting the read end cap. At this point, ensure that your screens are clean. If not ( even a speck of dust is too much ! ) then take it out, clean it with some alcohol wipes and a lint-free cloth and re-insert. Be careful cleaning. The rear screen is covered with a layer of plastic that scratches VERY easily. Be especially careful because some of the "dust" may be "aluminium filings" which wills scratch it. | 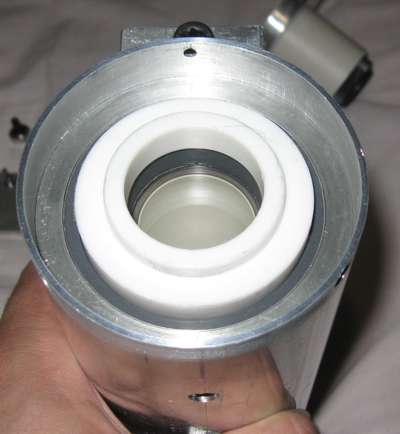 |
| When ready, insert the rear end-cap. There are alignment marks to tell you which way to orient it (punch holes) You may need to jiggle it around, to get the insulator to sit correctly, but it will go. The insert the three screws, BUT DO NOT SEAL IT YET. This is important, as you will need to confirm everything is working before you do that. | 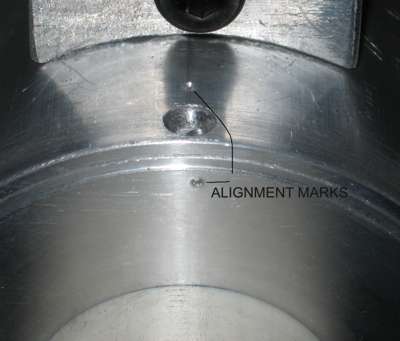 |
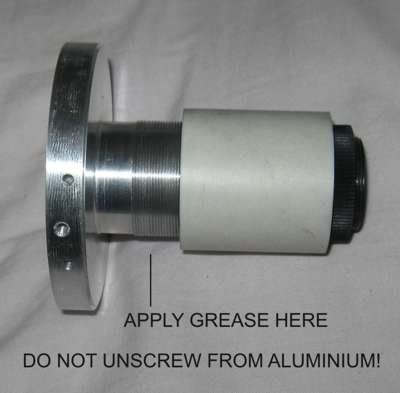 | You can however grease it up. Wind out the eyepiece holder so around 10mm of thread is showing. Apply grease to this. Nown tighten back up. You may also find that it's a little tight when you insert the eyepiece. I had a few burrs on mine which I shaved off,out with a sharp knife at an acute angle. Once you press it in, wind the holder all the way in. It will allow you to fully seat the eyepiece. Later you will seal this in with a little silastic or some epoxy. DO NOT GLUE IT IN YET. Again, there is more to do. |
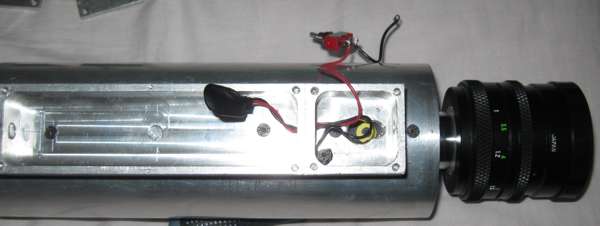
| Now you should be able to insert the screw for the positive wire. Make a loop in the positive end ( or attach a suitable terminal ) and screw it into the tube. Be careful not to lose the screw.since you may have to open the scope to retrieve it if you do. The switch can now be mounted and screwed into place as well and the covers installed ( A thin plastic film or gasket material will help seal them. You can silicon the front cover later as well if you like, but not before testing ). Once complete, you're ready to install the front lens. | 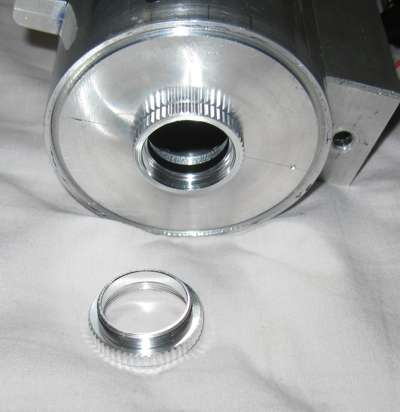 |
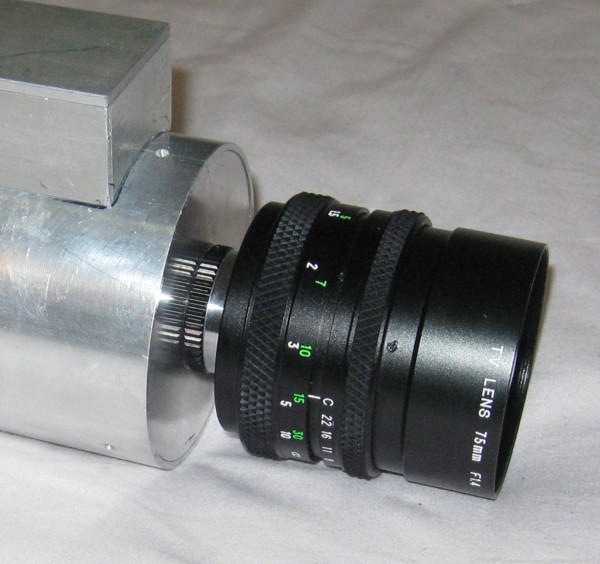
| The housing contains a CS-Mount spacing between the front flange and the tube's sensitive photocathode. This means that CS and C mount video lenses will connect straight up, although for C-mount, you'll need a 5mm spacer. This simply screws into the front lens mount as shown above. To Test: Wait until it's dark, go outside and switch on. Remove the lens cap ( Bet you didn't ! ) and try again. You will see a blurry image. Focus. Celebrate. NOW go back and finish sealing in the tube and rear eyepiece screws and seal since you're done and it's all working. You can also put a thin fillet of glue around the eyepiece to hold it in and seal it off. The main reason for waiting until now is that if it doesn't work, you may have to disassemble. DONT FORGET TO UNPLUG THE POSITIVE CONNECTION OF THE TUBE FIRST BEFORE UNDOING ANY OF THE HOUSING SCREWS. Just email me if you're having trouble and I'll talk you through the process of troubleshooting. |
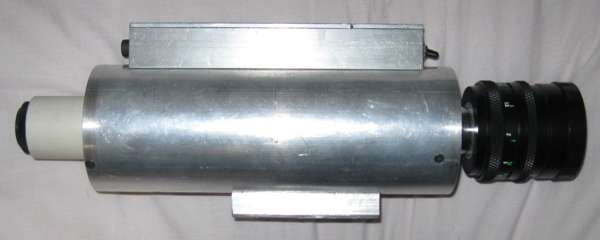
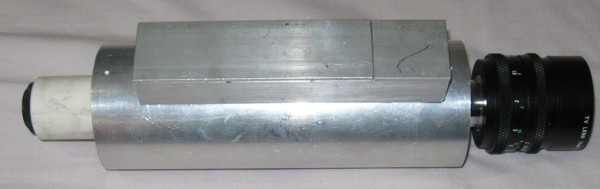
The finished item, fully assembled...
STUFF YOU REALLY WANT TO KNOW.
Obtaining the OTHER PARTS.
SUPPORTING INFORMATION.
The original mechanical data (plans) for the project - useful if you're making one yourself and need a starting point.
Plans: david-allthree.pdf
Assembled: david-assembled.pdf ( Note - As above, we made some changes to the design to simplify manufacture and address tolerance issues with material )
The Battery Housing Design: david-batteries.pdf
Rail Mount and Grabber Design: david-railmount2.pdf
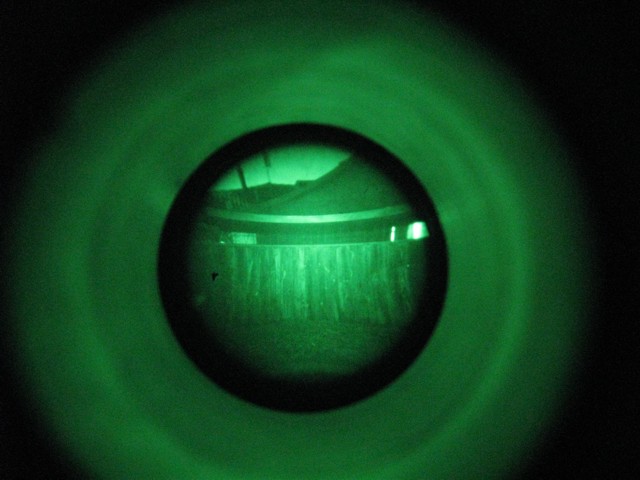
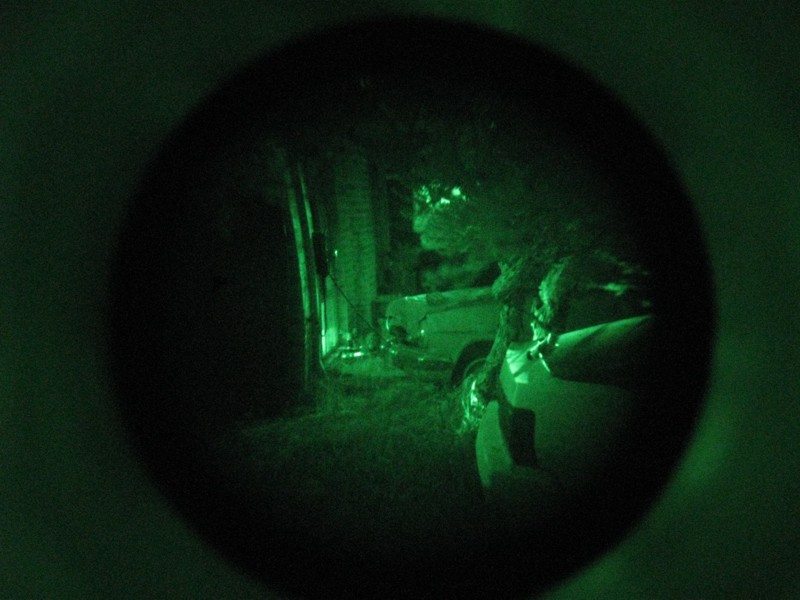
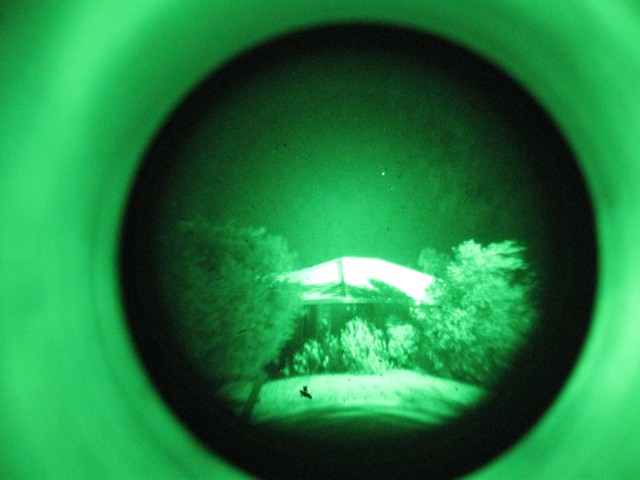
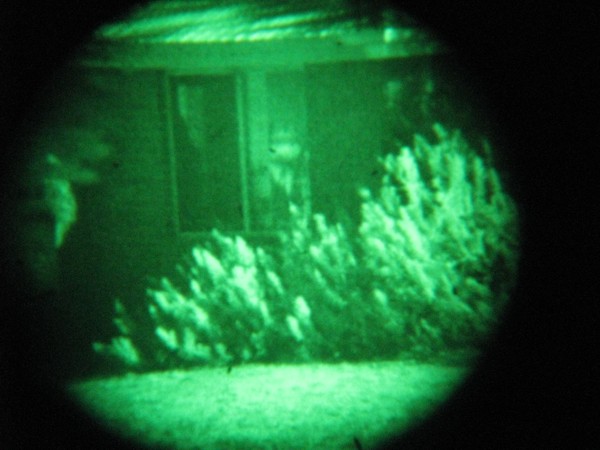
SOME IMAGES TAKEN THROUGH AN ASSEMBLED SCOPE.
Pictures of early prototype parts...
Any Questions? Leave a comment or email me directly.
David.