AUNV-TEMPORARY-FORUM
[ main ][ links ][ about ][ help ][ discussions ][ projects ]en 3 conversion of a Baigish 5P
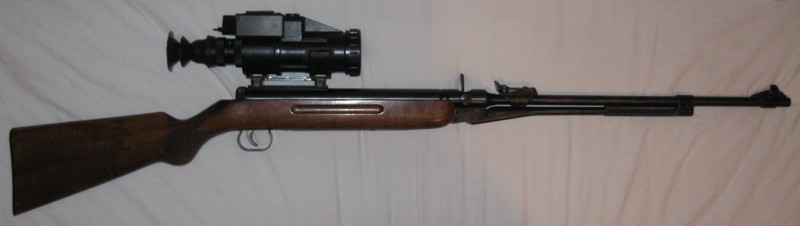
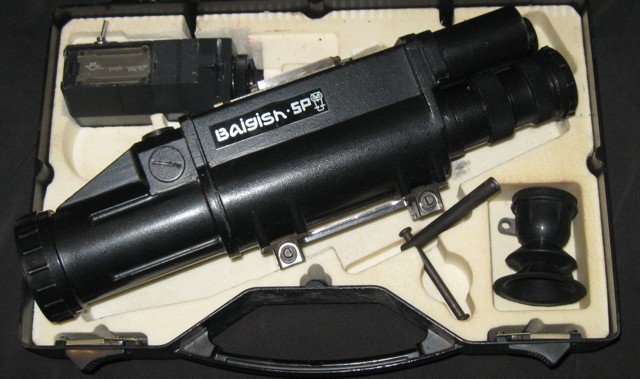
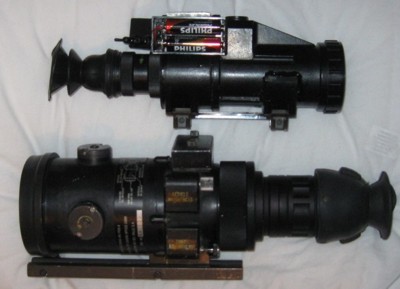
| The Russian Gen1 2-stage cascade riflescope is a reasonable performer at a budget price. It's heavy, long and a little awkward, yet has a solid set of lenses and a very narrow pupil diameter all pointing to previous use within the Russian military. | |
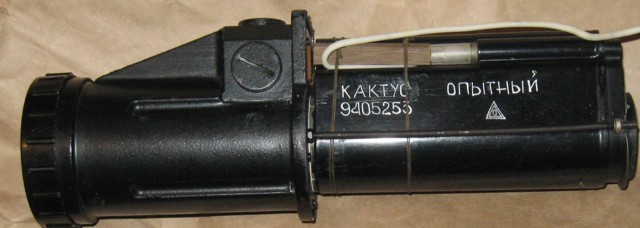 | You'll often find it's labelled as Gen2+ which is on the face of it certainly seems like a lie and this has persisted due to practically no one classifying it correctly. However it does have a very usable two-stage Gen1 tube known as the Kaktyc "Cactus" tube, which is non-inverting. |
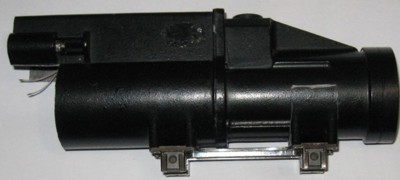
| Inversion within this scope is done entirely within the eyepiece, with the objective lens being a simple type. Of note is that the reticle optics are located entirely within the objective lens mount, allowing the entire module to be removed and separated, leaving a very fast objective lens assembly. Well, I had a Baigish 5P, but the performance deteriorated due to age to the point that it required significant light to work - as much as a Gen1. On top of that, it's not really that great up close - the fixed lens makes it a little cumbersome there. However it did present a great opportunity for a project - in this case a Gen2 or Gen3 upgrade. | 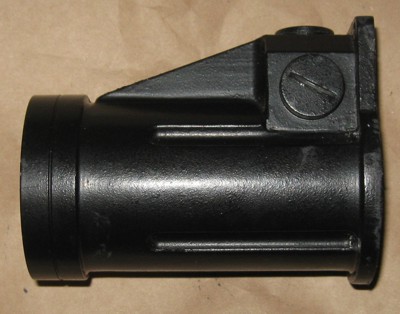 |
| The objective lens mounts to the front of the main housing through six bolts, which cantilever it, so the front rail mount needs to stay if it's going to remain accurate.I considered several Gen2 tubes, which were reasonably priced due to being non-inverting. In the end, however, I went with a low-end Gen3 tube with a stated FOM of 1600. This came from a Litton M2160 Intensified Camera Adapter which is used to provide night vision capability for people using video surveillance. The tube was functional, though a little old, and had a few burn marks on it. The center however was relative good and it was a non-inverting tube. A quick check to the zero-focal position suggested that it was possible to focus at infinity ( a real problem when converting Gen3 into a Gen1 or 2 design that utilised FO input windows ) so the project was ready to proceed. | 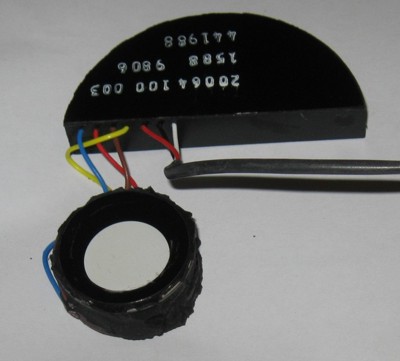 |
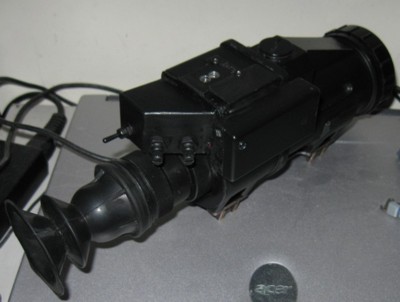
 | The first thing I needed to do was keep the tube tight. There's not a lot of space to mount a Gen3 tube into a Baigish, which generally has everything cascading back from the front lens. Diameter was critical as the original tube used an external power supply, so I determined to do the same. Repotting the tune was done with LET to allow most of the original potting to remain and to provide cover where it was removed during original disassembly. |
| Wires remained intact and were bundled with RTV tape and then the tube was wrapped with RTV tape to keep out moisture and allow operation in the mostly open interior of the casing.The next phase was to modify the scope itself. The original scope was very large - the tube extended the entire length of the middle section. That had to go. There were some optical models I could have used to maintain the separation, but little reason to do so. Besides, I wanted to retain the eyepiece. An inverting eyepiece that has a small exit pupil diameter can be quite useful, allowing you to use it without a rubber boot without any light escaping. The tube assembly fits into the eyepiece assembly between a rubber O-ring and a plastic cup, protecting it from jarring double-recoil. 8.0mm spacers maintain even tension on the tube when installed. | 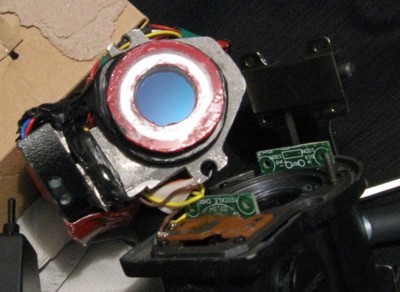 |
 |  |
| Now it was possible to assemble and test, seeing the first images that came from the scope. The problem though was the power. The original Litton power supply required 12v to operate. 12v = 4 x AA batteries. That's too much to carry around and it's heavy... I considered some alternatives, but even a 3 cell Lithium battery is only 11v. There was no easy way to power it. The solution was to make it run on 2 x AA batteries then like every other night vision device commonly out there. This was achieved with a small circuit that pumps up the voltage. It's known as a boost converter. This will also regulate the voltage as the battery gets flat providing the same performance intil it fails completely. Once assembled, the boost circuit was coated in LET and based on a PET wafer, sealing out moisture and protecting the circuit. The other advantage is it now runs off all voltages, from 2.4v ( NiMH ) to 7.4v (Lithium Polymer) as well as taking 2 x 3.6v Lithium ion "AA" cells. |  |
 | |
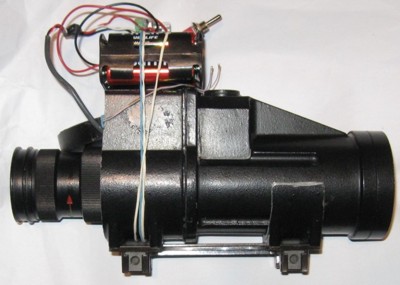
 | A small Brass Box was made to house the controls and seal off the back of the scope, while allowing most of the eyepiece to be hidden inside. The focal lock and adjustment is still reachable from the outside though. Controls include Gain and Reticle Brightness and an on/off switch. Batteries housings can be attached through the external power socket which allows different battery housings depending on what format is chosen. I've made AAA, AA and Lithium housings, which are field interchangeable. Model aircraft batteries up to 2S can also be used and usually support the same format, allowing extended use without having to recharge or replace batteries. |
 |  |
Finally, the front mount position was bonded to the objective lens ( It does unscrew though ) and then painted matt-black.
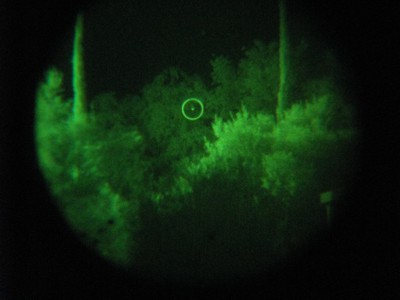
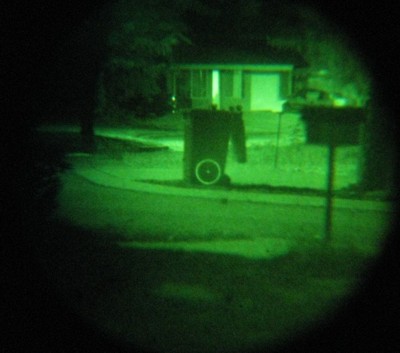
The result? A Gen3 riflescope that can handle air rifles, though it's really designed for longer distance rifles.