AUNV-TEMPORARY-FORUM

[ main ][ links ][ about ][ help ][ discussions ][ projects ]

Welcome to my PVS-5c monocular project. I was fortunate enough to get hold of a PVS-5c at a reasonable price. Or rather, the two tube and lens assemblies. One was faulty but the other worked quite well, even exhibiting a good resolution and amplification.

The intent, then, was to make a single monocular with a PVS-5c housing so that I could use it to navigate in the darkness when walking around my farm ( hands free )

The ideal solution would be to make it as close to a PVS-14 as possible. The PVS-14 has a range of attachments through a self-aligning mount surface on one side. This allows it to be used with J-arms and similar add-on parts. The PVS-5c is very close in physical appearance to many aspects of the PVS-14 - the lens looks identical and the PVS-5c is arguably superior to the PVS-14 lens, so that was my choice of "remodelling".


The AN/PVS-5c (left) and the AN/PVS-14 (right) share similar design characteristics.
The mount point on a PVS-14 is the same as most camera tripods use to mount to a camera. I removed a mount-point from a camera and held it to the tube with a hose-clamp. Then I wired up the tube to a small, 3v power supply. This made the tube work, but it wasn't very attractive and was quite easy to break. It did, however, work quite well and allowed mounting with a J-arm.
A "Dummy" PVS-14 can be obtained from Airsoft sellers. These are a close replica to the AN/PVS-14. With a little effort, they can be pulled apart.
The dummy PVS provides several components that are made of strong plastic. There's also two halves - allowing easy access to components once installed. I removed the center section and mapped out the differences between the PVS-14 and the PVS-5. The illustration shows the PVS-14 tube ( red ) and the PVS-5 housing (Yellow ) concentrically located. The Blue circle shows the "compromise" location of the tube to allow for structural integrity of the lower housing - meaning the center has been shifted slightly - less than 3mm inwards when mounted.
The next step was to cut the main ring of the housing and re-radius the mount point to allow the larger tube to fit, then to install a threaded receiver for the mount point and two contacts for the magnetic proximity switch located in headgear. 
The electronics were added to allow a three-position switch at the rear ( On, Off, Helmet switch ) and an IR switch ( 400mw of infrared light at approx 850nm ). The battery holder was bored out ( it was too narrow ) and springs and electrical contacts were added. Then this was assembled completely. The result is that the scope is now mountable, uses the "external" switch capability, has significant infra-red output for enclosed indoor spaces under non-covert operation and the batteries can be easily replaced.
Completed.

[ Login ] [ PERSONAL MESSAGE ] [ HELP ]
Logged in as:guest: 1:guest ** :./data/user-data/projects-monocular

Comments:

guest at 00:28:08 05-13-2010

Very nice work indeed, so how did you attach the battery housing to the tube? I can't see that from the pictures.  And the wiring, do you have drawings of how you wired it up?? I'd love to see it. you can e-mail at -email deleted- if you like.

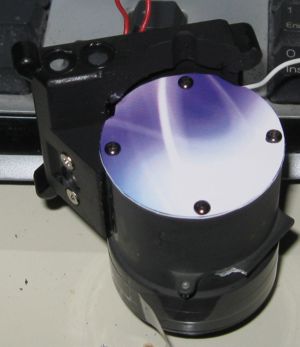
Hi Snazzy - I'll send you an email. The battery compartment base is bonded to the tube with epoxy, though the battery holder itself unscrews. Wiring is fairly simple but I did need to install some contacts within the battery housing and expand the diameter of the channels about 0.5mm for ease of installation. I also installed the auto-on leads by soldering the wires onto the screws, with this running through a three-way switch.  If you're intent on making one, I'm happy to offer suggestions as you go - It's not an easy project though and does require a little skill in shaping the base. David. 


guest at 10:03:52 05-21-2010

Dave , I have no issues with tools/cutting making a good mess on the floor, been doing that kind of thing for a while now.  That project of yours came out so good.  So epoxied the battery box on you say.  I've got a 5B lens on my tube which is a bit smaller but it is good. Not quite as big as the 5C lens but it should work alright.   A project I finished a while ago I took a 5B tube and I put a camera lens for an objective and PVC to make the connection to the tube, and the eyepiece I got surplus that I borged onto the tube with more PVC, then I put the whole thing on a picitinny rail for rifle mounting , came out good but I think the camera lens doesn't let in enough light.  So now I want one like yours, have to order up the airsoft parts.

Look at the F-number to find out roughly what size the aperture is. it's the number after the colon on the lens. Good lenses for night vision have F-numbers lower than 2. It sounds like a good project. Please send me some pictures when you're done... I'll add an "email me" link to the front page of the site this weekend.  David.


End of page.